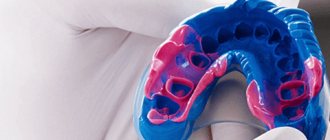
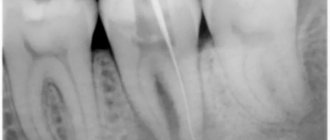
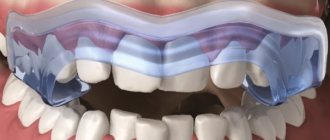
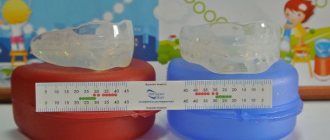
The manufacture of replacement structures, or dentures, is a task carried out by a dental technician. In this case, one of the key elements that ensures an accurate representation of the features of the anatomical structure is an impression - a copy of the jaw row, which is a kind of “sketch”, is used to reflect elements that need correction. The instruments used to obtain it are individual impression trays.
Standard spoons
There is a wide range of standard impression trays on the market today. The first factor to take into account when choosing is the working jaw. For example, spoons for a moving jaw are equipped with a projection for the tongue and are shaped like a horseshoe, while products for a fixed jaw are similar to a regular spoon.
When it comes to choosing a partial impression, it is important to take into account the working side of the jaw.
Segmental designs
We are talking about spoons designed for simultaneous removal of models of both jaws. Instead of a bed of correctional mass, they are equipped with a thin layer of nylon or gauze. Like standard modifications, these spoons have sides.
The model removing compound is applied on both sides of the intermediate layer. Simultaneous taking of impressions from the lower and upper jaws allows you to reduce the duration of the procedure due to the absence of the need to additionally register the bite.
However, the practicality of using such a technique is controversial. In some cases it is quite difficult to obtain a universal impression. It is worth keeping in mind that insufficient rigidity of the spoon can negatively affect the quality of the finished model.
Another important aspect is the condition of the dentition. Spoons are made for patients with partial or complete edentia.
Material of manufacture
Spoons can be made of polystyrene, aluminum, steel and other materials, depending on the intended purpose. For example, metal products are used to obtain the most rigid impressions, and plastic structures are widely used in the field of implantology. In a number of clinical cases, plastic and metal products are interchangeable.
General overview
Making an individual tray is a procedure, the need for which is determined by the specific development of the dentofacial apparatus of the patient who has applied for dental prosthetics services. The product completely covers the area where the prosthesis is required and is located in the area of transitional folds of the mucous membrane and the sublingual line.
The term "cast" or "impression", regularly used by dentists, is used to describe a prototype of the jaw, which is made using plaster or silicone material. An individual tray in this case is an orthopedic instrument designed to fix these casts. Moreover, individuality means manufacturing and use for only one patient, while standard models involve repeated use, which often negatively affects the quality of the finished prosthesis.
The term "impression", which is quite common in dentistry, is usually used to describe a positive, relief prototype made of plaster or silicone. The formulation “taking an impression of the dentition” can be considered as a definition that combines two procedures: taking an impression and forming a model.
An individual tray in dentistry is used to take two types of impressions:
- Working, or precision – precise impressions used to create functioning replacement structures installed on a permanent or removable basis;
- Auxiliary - as the name implies, this group combines all additional impressions that eliminate information gaps and make it possible to clarify the specifics of the occlusal relief to improve the quality of wearing the prosthesis.
As an alternative, the use of occlusal recorders is allowed, the task of which is to functionally complement and combine these types of impressions. If there are a sufficient number of surviving units, their use is not always advisable, but the desire to achieve optimal occlusion and shorten the adaptation period are good reasons for using recorders.
Based on the technique of designing the marginal areas, anatomical and functional impressions are distinguished, however, it is quite difficult to establish a clear line of differentiation between them. Functional variation involves the use of clarifying movements of active and passive properties, allowing one to obtain additional information necessary for the formation of a prosthetic system. At the same time, the use of anatomical impressions is relevant in the manufacture of fixed structures, for which the specific structure of the tissue of the prosthetic bed is of particular importance.
Individual impression trays
Such structures are made in a dental office or in a laboratory based on an auxiliary template. As a rule, they are used to create dentures for edentulous patients. An individual tray serves as the basis for the impression, and the composition with a low viscosity index allows you to convey the relief of the gums with maximum accuracy.
Despite the high softness and thinness of the layer of corrective composition, the finished impression is of high quality. The exclusion of obvious undercuts and relief minimizes the thinning of the material after hardening. Deformation when removing the spoon is also minimized.
Individual designs are used in the field of removable prosthetics, as well as when working with prosthetics based on the installation of implants. The structural difference between orthopedic devices based on implants and human teeth is the complete lack of mobility of the former. If mobility does occur, it is practically unnoticeable, so minimal inaccuracies are allowed when working with fixed prostheses, but they should not exist when making implant prostheses.
For implantology, it is important to obtain a reliable impression, so it is advisable to use an individual impression tray, which minimizes the likelihood of deformation of the correction mass.
Manufacturing methods and materials
In modern dentistry, a variety of materials are used to make custom trays, including wax, polymers, rubber, and even metal. To obtain high-quality prints, the preferred option is to combine materials with different viscosity parameters. The high-viscosity formulation provides sufficient rigidity, while fine-grained correction materials improve imaging accuracy. Standard protocols also provide for the possibility of three-phase (the number of phases means the number of compounds) impression taking, with the addition of medium-viscosity material.
Manufacturing stages
To obtain two-phase impressions, a one- or two-step approach is used. In the first case, an individual tray is used for simultaneous application of both compositions, while the corrective mass can also be applied to the surface of the tissue area of the prosthetic bed - followed by indentation of the element. The two-stage method differs in the number of placements of the spoon in the oral cavity - in the second case, the instrument is used twice, first with the base material and then with the corrective material. Practice shows that such an approach provides an accurate result, but leaves the possibility of making a technical error, which is practically impossible to identify before manufacturing a replacement structure.
Manufacturing Features
The production methodology is similar for laboratory and clinical conditions. First, the doctor removes the auxiliary model from the patient’s jaw, which is crimped with a special plate of dental wax. This allows you to isolate the model from the tray itself, providing the necessary space for correction material.
In practice, this stage is often accompanied by the production of unique limiters or positioners. In the projection of those elements of the dentition for which prosthetics are not provided, as well as in the frontal palatal part, small windows are formed. The latter are filled with plastic, which ensures precise positioning of the spoon in the patient’s mouth.
The doctor marks in advance the teeth and area of the palate that will serve as a support for the impression tray on a plaster template. Then a plastic composition is layered onto a wax template pressed with a plate to model the bed and elements for convenient work. At the end, the photocurable material is placed in a photobox or polymerization illumination is carried out. When working with cold-set plastic, the material is left until completely cured.
The difference between an impression and a cast
A dental impression and an impression are completely different structures, but they are sometimes confused. An impression is a negative representation of the hard and soft tissues of the jaw arch. It is done by the dentist during the patient’s appointment to transfer the data to the laboratory to the dental technician.
The impression is made in the laboratory by a worker who will create the necessary structures. Casts are a model of the teeth and gums made from plaster. Working with such models allows you to most accurately recreate the missing units or parts thereof.
Comparison of open and closed spoon methods
Gray Radtz
Implantologists currently have three impression-taking methods to choose from: open tray, closed tray, and digital scanning. Each of these methods has its own advantages and disadvantages, and the choice is usually based on an assessment of the specific situation. Digital impression scanning currently has less than 10 percent market share in the United States, so we'll take a closer look at the remaining two methods. We will review when and where to use each method to maximize clinical success, create the most comfortable patient experience, and prevent possible failures.
The restorative part of the implantation is the culmination of many months of planning and painstaking work. The basis of the restoration is taking the final cast. Therefore, the doctor must take a responsible approach to choosing the method of taking an impression. Any one of them can produce the desired results, but in some cases one method may be preferred or even recommended for obtaining certain information.
When taking an impression using the open tray method, the impression cap retaining screw extends beyond the tray and must be unscrewed before removing the tray. When using the closed method, the impression cap is removed inside the impression, the impression is then removed, after which the cap is unscrewed and inserted back into the impression. The need to remove and re-insert the impression cap with the closed method inevitably leads to the possibility of an error, albeit small. Re-insertion and precise adjustment of the impression coping within the impression material requires close attention to detail. Any mistake at this stage will go through the entire implantation process and will certainly lead to an unsatisfactory result at the prosthetic stage.
So how can you determine in which case to use one or another method of taking an impression? In my practice, I use the open technique if one tooth needs to be restored and there are no factors preventing this. Sometimes when restoring a second molar, the patient cannot open his mouth wide enough to remove the retaining screw from the open tray. With a stronger restriction in mouth opening, the same situation arises when restoring the first molar. It is very important to ensure that the impression cap can be removed before choosing the open tray method.
When installing several implants, the choice of method must be approached even more critically. A contraindication for the closed method is taking an impression for several implants that are not parallel to each other (Fig. 1).
If you take an impression from such implants using the closed method, there is a high probability of blocking the impression in the mouth. Depending on the position and inclination of the implants, I sometimes use a combined approach with a closed impression coping on one implant and an open one on the other(s). In addition, when several teeth are implanted at the same time, the open method allows the doctor to connect the implants together, which in turn increases the stability and accuracy of the impression.
There is almost universal agreement among dental technicians that the open tray method is preferred due to its accuracy and stability. Our in-house technician Jeremy Johnson says, “Using an open technique increases the accuracy of the impression and greatly reduces the possibility of error.”
Let's talk about spoons
No discussion of impression-taking techniques would be complete without mentioning the choice of impression tray. Technicians almost always prefer full arch impressions.
“Full impressions provide greater stability of the model, as well as the accuracy, functional anatomy and esthetics of the final restoration,” says Johnson.
Next, you need to decide between a standard and an individual spoon. A standard tray can be used for one or two implants. If three or more implants are installed, a controversial situation arises. In this case, it would be a good idea to consult with a dental technician. When it comes to full implant prosthetics, the vast majority of doctors and technicians are inclined to use a custom tray.
Impression materials
Lastly, we will discuss the choice of impression material. As already mentioned, the best impressions for implantation are considered full impressions. As we know, taking an impression is a rather unpleasant procedure for many patients. When using an open technique, this process can become even more unpleasant because the impression remains in the mouth for additional time while the doctor removes the retaining screws.
When choosing an impression material, the following factors are taken into account: accuracy, mixing speed, tensile strength, hardening time and hydrophilicity.
I have found that Voco's V-Posil material combines all the necessary properties for taking impressions of implants. The material has excellent tensile strength, precision and hydrophilicity, and also shows acceptable working time. The material is heat sensitive and setting time is significantly reduced when the material is moved from room temperature to a warmer oral environment. When the material is placed in the mouth, hardening is actually accelerated to a “click hardening”. This ensures the stability of the impression and helps achieve the precision required for implantation.
Clinical case
This clinical case demonstrates open and closed methods of taking impressions for comparison purposes.
An implant was installed in the area of tooth 45 four months ago, and now it is time for prosthetics. The first impression was taken using a closed technique. In Fig. Figure 2 shows the imprint of the impression cap in the finished impression. The impression cap was then unscrewed from the implant and carefully placed into the impression. The impression was sent to the laboratory.
The open technique was then used. In Fig. Figure 3 is a model showing the position of the impression cap screwed into the implant.
It is clearly visible that the screw protrudes strongly beyond the occlusal plane, which makes it easy to unscrew it before removing the impression from the oral cavity. In Fig. Figure 4 shows what an impression taken using the open tray technique looks like.
Both impressions were sent to the laboratory and the models were cast. We asked the technicians to choose the most accurate impression, and they decided to work with an open impression. Rice. Figure 5 shows a working model of soft tissues with an implant analogue installed.
Using this model, a metal-ceramic crown with a screw fastening was made. Rice. 6. Trying on the finished crown in the oral cavity took no more than 10 minutes. The aesthetics and position of the crown turned out to be ideal.
Both open and closed impression techniques can provide the desired result if you strictly follow the technology, pay attention to detail and choose quality materials. However, none of these techniques can suit all clinical situations. Therefore, it is so important to evaluate each clinical case individually and make a choice based on this assessment. Mastering these two options allows you to consistently achieve excellent results for your patients.
about the author
Dr. Gray Radtz operates a private practice in Denver and is on the faculty of the University of Colorado School of Dental Medicine. Dr. Radz lectures in cosmetic and prosthetic dentistry and serves on the editorial boards of seven dental journals.
Varieties
Dental stamps are divided into working, auxiliary and occlusion recorders. The first option is the most important and accurate prints, which show the whole picture of both jaws. With their help, working models are then made to recreate the patient's jaw in the laboratory.
It is with these structures that all subsequent work is carried out. The latter are created as additions to workers and carry information about residual parts. What was not taken into account in the first version is present on these stamps.
Using an auxiliary form, you can see the relief of the occlusal surface of the antagonists. This is important when working as a technician and, based on the clarified data, working models are edited and supplemented.
Occlusion recorders show what is not taken into account by any of the above designs. If there are enough antagonists, this option can be skipped, which is what most dentists do. However, microscopic occlusion recorders can improve the quality of the structures created. This approach will allow you to skip the fitting process when installing the prosthesis and will increase the percentage of speed of adaptation.
Results and discussion
A study of chewing efficiency in patients of the 1st group showed that their chewing efficiency has a positive trend, reaching maximum values (65%) by the end of the 1st month of using dentures. The maximum value of chewing efficiency in persons of group 2 was 77%.
Dynamometric comparison of the degree of fixation of prostheses when applying a horizontal load showed their maximum and significant increase by the 30-35th day of using the prostheses. The opening force of the peripheral valve in patients of group 2 was 2520–3710 g in the upper jaw and 2340–2520 g in the lower jaw in any zone of load application. In patients from group 1, the maximum fixation value was 2270–3190 and 2150–2270 g in the upper and lower jaws, respectively.
A study of the timing of adaptation to dentures in patients showed that complete adaptation, which means the absolute restoration of chewing function, in patients from group 2 occurred within 30-35 days, and in group 1 - after 35-40 days of use.
